21
Sep
2017
Authenticating via SAML 2.0 with Azure AD on Atlassian Data Center
Atlassian now has a SAML 2.0 Authentication app available included with Confluence data center, if obtained from the Marketplace for JIRA Software Data Center, JIRA Service Desk Data Center and Bitbucket Data Center.
Steps to Authenticate via SAML 2.0 with Azure AD
Recently GLiNTECH connected Data Center using Azure AD. Our tips and process is shared below.
Step 1: Ensure users access your Data Center via HTTPS
Regardless of your network structure, Azure AD will only accept applications that are secured by SSL/TLS. Configuring SSL/TLS is beyond this guide, but there are many resources on the Atlassian Atlassian Knowledgeable.
Step 2: Ensure you have a Data Center license installed
Although the add-on can be installed on Atlassian's server applications, the configuration page is hidden and the SAML endpoints will refuse to accept authentication requests unless a Data Center license is installed.
Step 3: Send the SAML endpoints to the Azure AD administrator
Your Azure AD administrator will have to add the JIRA SAML SSO and Confluence SAML SSO Azure applications by Microsoft. At this time, there is no Azure application for Bitbucket Data Center so this application will need to be added manually to Azure AD. Please supply the following details to your Azure AD administrator:

Note: if you have integrated Active Directory with your Atlassian application, then you are probably logging in to the application with the sAMAccountName. Your Azure AD administrator will have to overwrite the default account principal to be sAMAccountName.
Step 4: Configure the SAML authentication plugin
Your Azure AD administrator will send you a FederationMetadata.xml file. You will have to extract the following elements from this file:

Step 5: Test your connection
Configure the Login Mode to use SAML as secondary authentication, in order for it to be tested from the Azure AD application portal first. Once tested, SAML can be used as the primary authentication to enforce for all users.
Errors you may Encounter
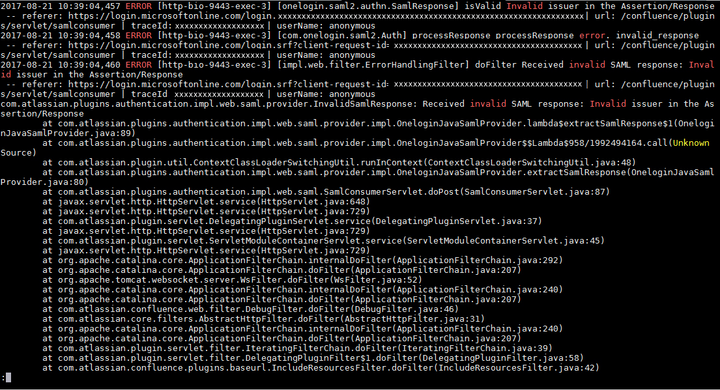
Received invalid SAML response: "Invalid issuer in the Assertion/Response"
This is caused by the incorrect Single Sign-on Issuer configured. Make sure you have copied the entityID attribute correctly, including the trailing slash.

Received SAML assertion for user <email address>, but the user doesn't exist in the product
If you have connected your application to Active Directory, then the application will expect the login username (sAMAccountName) to be passed from Azure AD as the user principal. You must ensure your Azure AD administrator uses sAMAccountName instead of an email address.
We hope this was helpful! For more questions or consulting, please contact the GLiNTECH team.
